Thursday, May 9, 2013

Backpacking without breaking your back – 3


Fire or at least combustion.

Different ways to spark your fire into life.


                Combustion – You will need to light fire somehow. Whether it is your stove, fuel tab or campfire you will need something to start it. There are many choices that have been used for many years. I try to carry three ways to make fire with me.
1)      Almost always in my pocket is a butane lighter. I don’t smoke, but it is so much more convenient to use a lighter to light a stove several times a day.
2)      Attached to my fixed blade sheath is a ferro rod. These work when you need them to. Wet, cold it doesn’t matter you will get 5,400*F when striking one of these. Along with that I carry some sort of accelerant whether it is Mini-Inferno, Wetfire or a homemade starter. I will use natural when I can, but I want surefire when I NEED it.
3)      Flint and Steel to me is the best long term fire starting method. As long as you have a Steel, everything else can be found or made in the woods. Flint and Steel works so much easier than friction fire for me.
4)      Some might carry matches, I never really have. It is all up to what you are comfortable with.
              Yes I can start my stove with a ferro rod. In fact I had to on the last trip I took because I loaned out my lighter before leaving and never got it back. You should keep some sort of dry tinder in your fire kit for the flint and steel and even the ferro rod. Practice good fire building skills every time you build a fire. A lot of people tend to skimp on preparations when building their fire. They start out with huge piles of prep, then a few fire later the piles get smaller and smaller. Until eventually they don’t have enough preps to get the fire going and have to start over again. Muscle memory is what you are building each time you build a fire. Meaning as you build your fires over and over again, you gather material with less thinking each time. When or if you are ever in an emergency situation, and you need a fire you will have to think less about how much tinder and preps to gather to have surefire. Each and every time I go out I “practice” all of my skills. Much like a Doctor practices medicine, everything we do is practicing. We might not need a fire to keep warm when we light it with Flint and Steel, but if we ever do and that is all we have we will be glad we practiced with it. All of these fire methods will fit in a very small lightweight package even a small Altoids sized tin. I do not carry all of my fire starting ways in the same spot though. I carry a lighter in my pants pocket, a ferro rod on my knife sheath and the Flint and Steel in a small tin in my pack. If I were ever to lose one, I would still have two more ways of making fire. By the way in the Flint and Steel fire kit are usually another small ferro rod and Fresnel lens with char cloth, Jute twine and a small stick of fatwood. 


Thursday, May 2, 2013

Backpacking without breaking your back, or bank account - pt 2

               
     I wanted to cover another sleeping item. You can supplement your summer bag with a fleece sleeping bag liner. These are lightweight, somewhat compact and can really add warmth to an existing sleeping bag. They usually run around $20 and well worth it. You can use them for a summer bag as well. I supplemented a 0*C bag I own for winter camping before buying my M.S.S. that my daughter now uses. A silk liner is another option. Silk will add another insulating factor, and can easily be washed keeping your bag cleaner longer. One item I never leave without is a Mylar emergency blanket. Whether it is an HD one or the small compact ones, I have used one when the weather dropped 15*F below forecasted and needed it to keep warm.
               
You must keep hydrated while walking. A bladder is convenient while walking but I find them difficult to use in camp. If you can reach a pocket on your pack for a bottle, to me that is a better choice. Do not put your water bottle somewhere that you have to stop and remove the pack to get at. You will not drink as much as you need to due to the inconvenience. Dehydration can lead to cramping, poor circulation, headaches and eventually death. You will need some way to treat your water. There are several schools of thought, they all work equally well and are a matter of choice. You can boil your water. I carry a stainless steel bottle for this purpose. I can boil right in my container. This is helpful in the winter months, when my water freezes I can pop my bottle in the fire and thaw it out. A couple of disadvantages with boiling: The water tastes flat due to boiling the air out. You also have to allow the water to cool before drinking. That can take a while during the summer months. Chemical purification works by treating the water with, well, chemicals, often Iodine or Chlorine. Be careful if you are allergic to shell fish do not use an Iodine water treatment. You simply add chemicals per the package directions to usually 32 oz. of water, wait the prescribed time and drink. Of course then you are drinking the chemicals you used to “clean” your water. It can take on the taste of those chemicals. The third way is to filter. There are as many filters out there as there are water bottles. I prefer two types, a pump and a straw. Pumps are convenient on longer treks and when doing a lot of cooking re-hydrating foods. A straw works best when going Ultra-light and day hiking. The Aquamira Tactical Pro I use screws onto any pop bottle thread so you can use a variety of bottles.
If you don't have far to go, cast iron is always a
 good choice for camp cookware.
                The camp kitchen is probably another area that people, me included, tend to over pack. There are a lot of choices out there for cooking in the field. Remember the more you dirty, the more you have to clean. I have kept my kitchen down to only a couple of things. When by myself I take a pot, either a GSI Oilcamp cup, the GSI Soloist or the GSI Halulite Kettle. They each have the pros and cons. The cup is small and light. The Soloist is big and comes with the bowl and the stove can fit in it. The Kettle will boil faster due to its wide stance. I will usually bring along an insulated coffee mug as well. I like my coffee hot and don’t like to have to keep reheating it. I will sometimes add a squishy cup for oatmeal or rice; otherwise I eat right out of any packaging the food came in. For utensils I have a titanium Spork and my Swiss Army Knife.
                You have to heat that water with something. There are 3 types of stoves: Liquid fuel, compressed gas fuel and solid fuel. I have one of each. For lightweight I use a compressed gas Pocket Rocket. It screws onto a canister and heats up quickly. I have 2 liquid fuel stoves: a Coleman single burner and an MSR Whisper lite International. I also have a couple of the small folding Esbit / Trioxane stoves and a wood burning Emberlit. Which do I prefer? The Pocket Rocket is my go to stove, small light weight and easy to use. During the colder months I will use the MSR Whisper Lite due to the compressed gases not working so well in lower temps like we get in Michigan. Next would be my solid fuel stoves. I like the Emberlit for small contained wood fire without having to build a full on fire. Being contained in the small area of the stove it works quite well too. It will boil water faster than over an open campfire because all of the heat is focused under the pot. Add a cotton bandana and your kitchen is complete.
                But what are you going to eat? I like a mix of foods on the trail and in the woods. I will usually take advantage the first day and eat fresh meat if I can. As long as it isn’t going to be extremely hot during the day hiking in. Bacon is always a good choice to carry in, who doesn’t love bacon over a campfire? Foods are mainly water, if you can eliminate that water, your food will be lighter. I can devote a whole article on dehydrating foods, or even a book, but there are many out there just about that. I recommend Trail Food: Drying and cooking for backpackers and paddlers by Alan S. Kesselheim, available in print and for Kindle. I carry a variety of foods with me. I like some of the Mountain House varieties and take those with me more when my daughter goes along. I like to also carry some of the rice and potato packets as well, except they are usually too big since they are 2 servings each. I will separate them into two portions and re-package for a trip. Along with them I will pack a small can of white chicken chunks, spam or other kind of meat in single serve envelopes. The envelopes are more expensive, but will save you a lot of room and weight. Fresh fruit is usually in my bag for short trips as well. Trail mix is good to have handy for quick snacks on the trail. Keeping that fuel in your body will keep you from getting tired too quickly. Continuously feeding your engine will keep you from getting lows and highs in energy and keep you on the trail longer and making your journey easier. Remember that you will be burning energy, carbs are important for fueling your body. You will learn as you go along how much food you will need to bring for how long you will be out. The first couple of times out bring extra snack foods. Your body will burn a lot more calories than you are probably used to.  Granola bars and energy bars are better choices than candy. Candy is mostly sugar and will be depleted quickly. Bring foods that can be quickly heated up or even not cooked at all for lunches on the trail. I know some people who just snack along the trail all day, without ever stopping for “lunch”. Remember to bring foods you like to eat. If you don’t eat it at home, you probably won’t eat it on the trail. Then you’re just carrying extra weight without any benefit.

Wednesday, May 1, 2013

Backpacking without breaking your back, or bank account


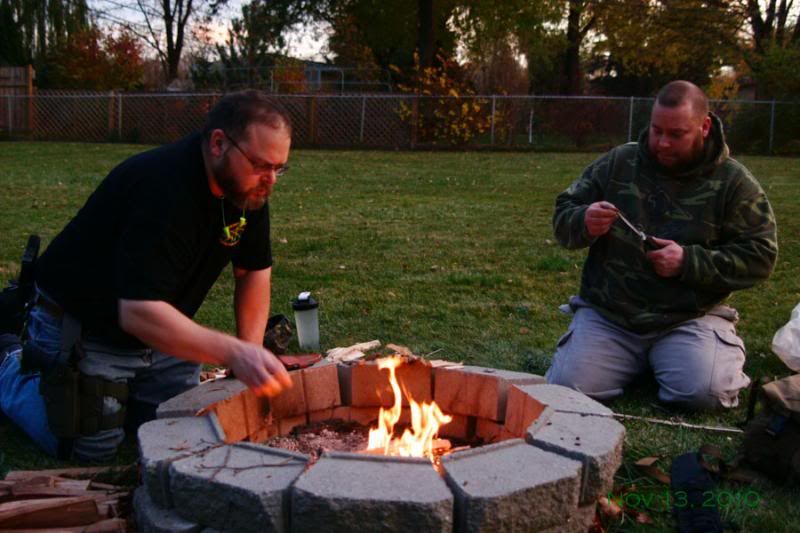
As I am getting healthier every day I am spending more time being active. One of those is more hiking and backpacking. I love to spend time outdoors, camping, hunting, fishing and just relaxing. Being around a lot of drunks in a tight crowded public campground is not my idea of relaxing.  
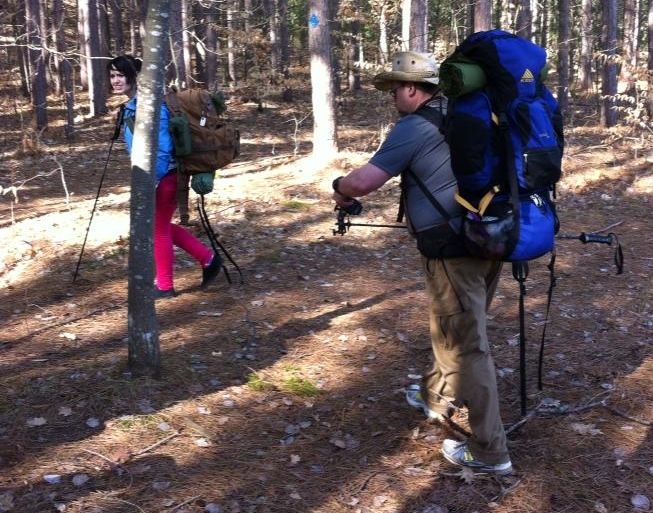
I don’t mind spending time with like-minded individuals, even going as far as sharing a site with some of them. My preferred location is in the middle of the woods. In Michigan that is not so easy to do. There are a few National Forests with trails and dispersed camping available. Getting there is a bit of a drive from where I live South of Detroit, but worth every minute and cent of gasoline. Once up North you have to get into the woods. This usually means hiking in. If you have never hiked in even a half mile to a campsite you may be in for a surprise.
                Everything you are going to use must be packed into your camp, with maybe the exception of water. Shelters, sleeping gear, food and supplies all have to be carried. Depending on the distance to your camp will determine how much or little you take with you. Or how much you bring may determine how far in you go. The choice is up to you. There are other choices too. Lighter gear substituted for heavier gear. The three main things to reduce your bas pack weight are: Pack, Shelter and Sleeping bag.
               The first to tackle for me was the Sleeping bag. Down can be very expensive, but light and small. For the summer I opted for the Lafuma light and warm 600 for $100 from Dunham’s Sporting Goods. Now I’m a “well rounded” individual, so it fits snugly. But it packs down to about the size of a 32 oz. Nalgene and weighs just over 1lb. I also acquired the M.S.S. or Military Sleep System, 2 bags and a Gore-Tex bivy which will run you @ $85 at gunshows or up to $150 at surplus stores. The green lightweight patrol bag is almost as small as the Lafuma, weighs about the same and is comfortable to about 50*F. The black medium bag is a little larger, weighs in @ 4 lbs. and is comfortable down to about 25*F. Combine them together with the Bivy and they get me down to 15*F. I have been down to -4*F but with long johns and Fleece bibs on.  So you can get the weight down from the car camping / slumber party sleeping bag without spending a fortune. One advantage of the M.S.S. is that the Gore-Tex Bivy can replace or enhance your shelter.
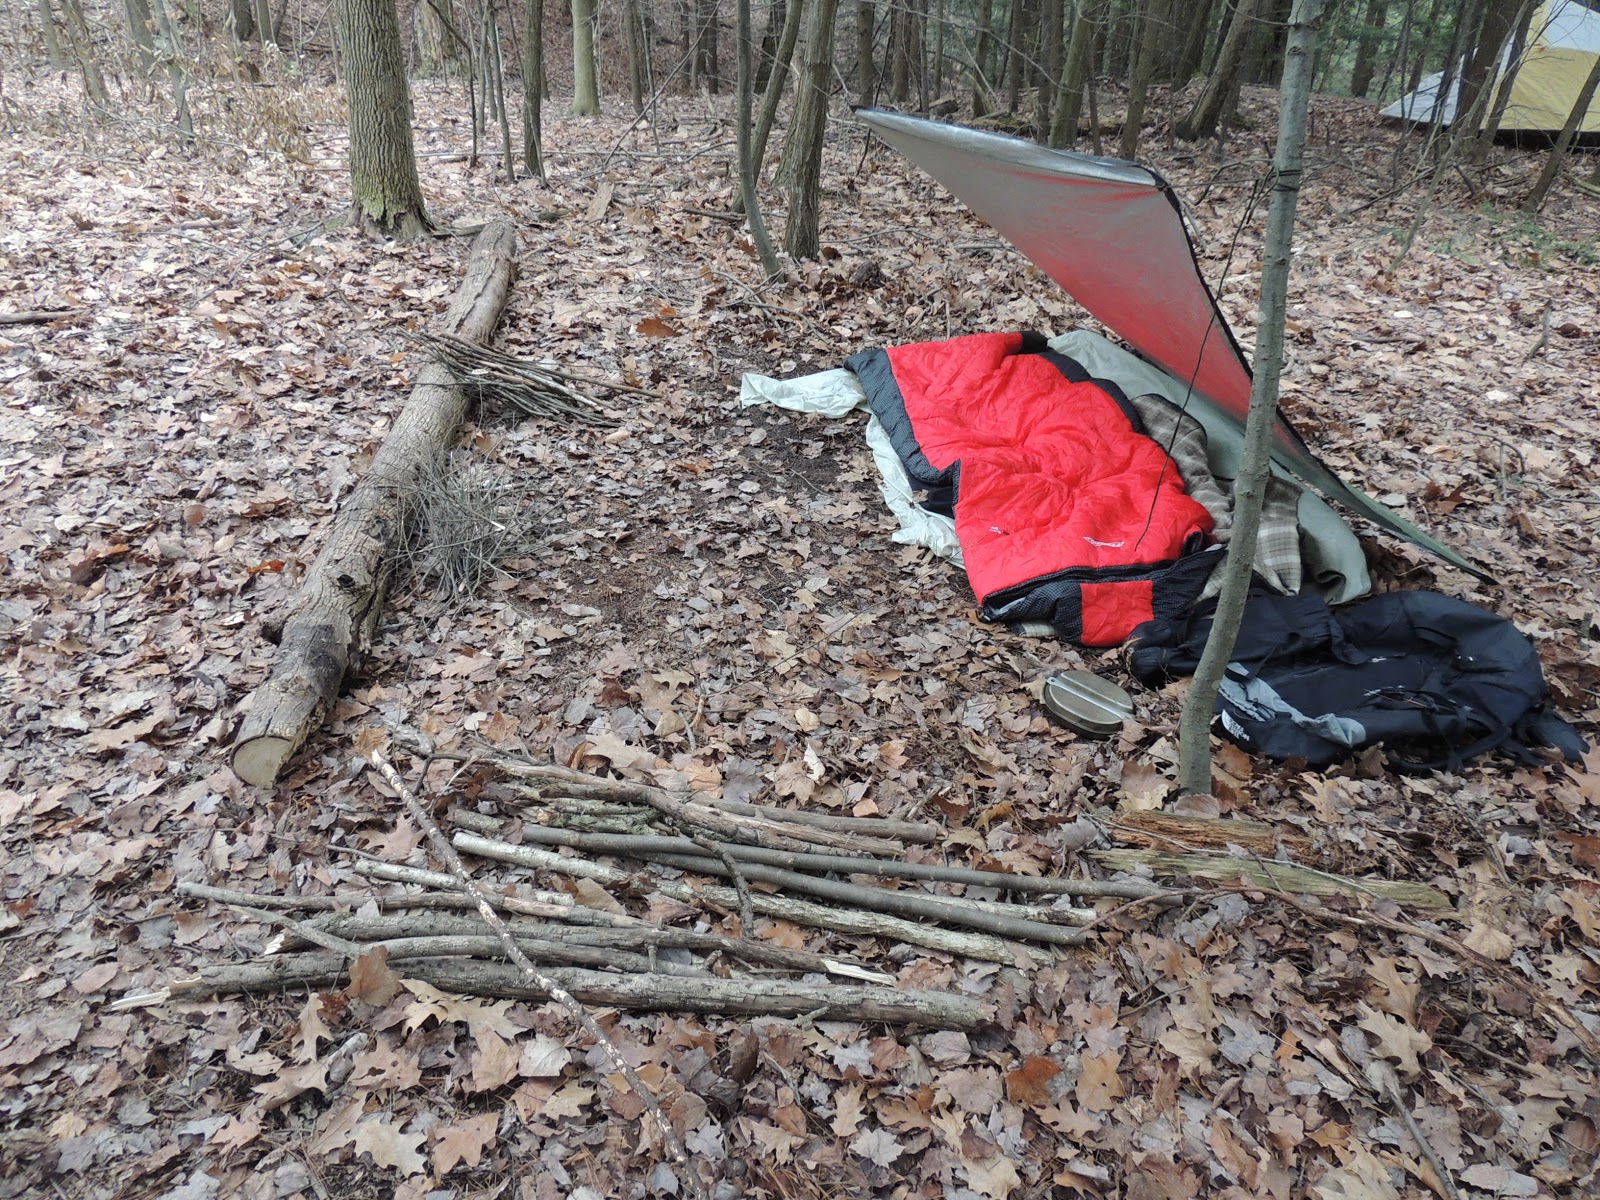
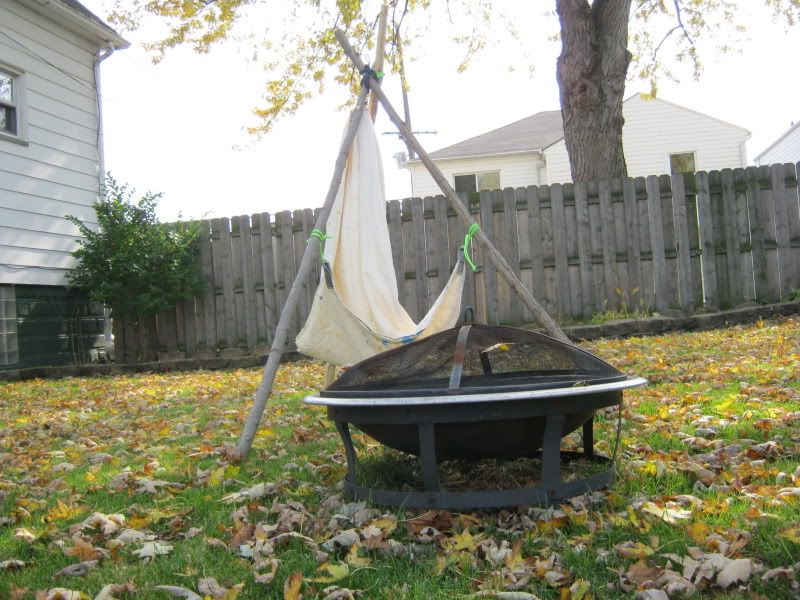
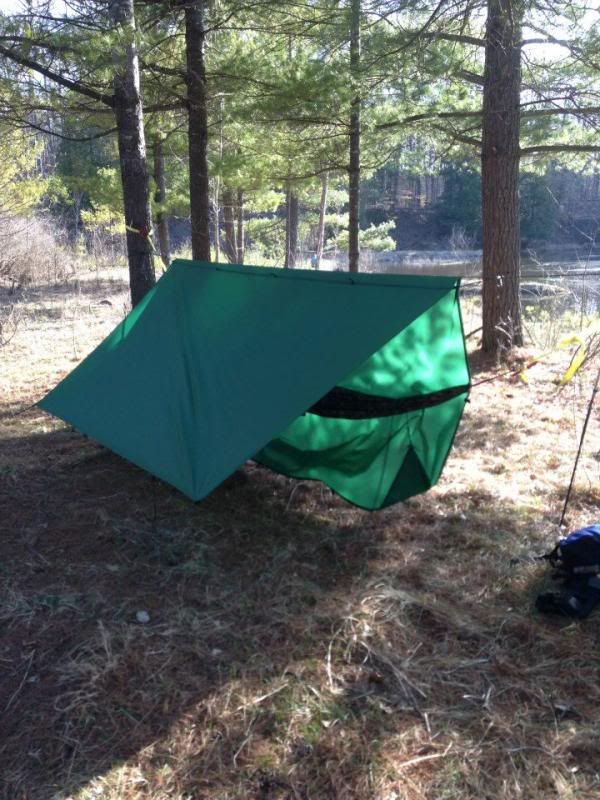
                For Shelter I use a tarp. I have used everything from a cheap polypropylene tarp from Harbor Freight for $7 to my Etowah Poly coated Nylon 10X10 for $55. I usually add a hammock to my shelter for comfort. Depending on the season will depend on which hammock I take. My go to tarp is my Etowah 10’ X 10’ weighing in at 1 lb. 8 oz. In the winter I use a Byer Traveler Hammock, $20. It’s a 9’ long gathered end hammock weighing in at @ 18oz. I use a 1” ¾ length Thermarest under me with a Trek Light Gear wing system. Basically it just adds about 4” of light padding over your shoulders with a sleeve to slide your pad into. During the months that the Michigan State Pest, the Mosquito is alive and well I use my Hennessy Asym Deluxe with built in mozzy net weighing in @ 2lbs, $150+. It’s a little heavier than the Byer, but more comfortable and roomier.

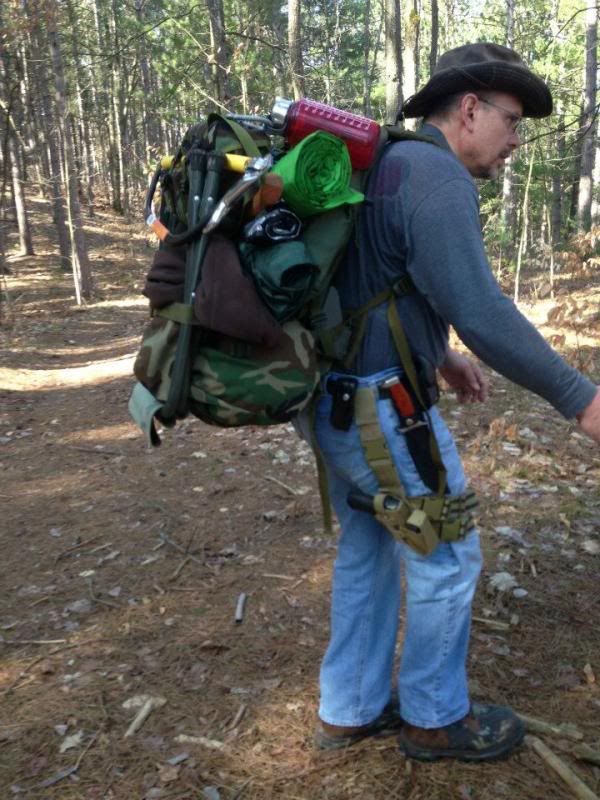
                Now you have to carry everything in something. This is where I see more people spend a lot of money buying and re-buying. If you are new and not sure what you will need or want it can be difficult to guess what size pack you will need. For a weekend trip a 50L pack should be sufficient for most people. If you get one that you can strap things onto the outside you can get away with more “things” The first thing to consider is your sleeping bag. Where is it going to ride? I prefer mine in the middle of my pack. So it goes in the main compartment, leaving the bottom compartment for my clothes and other things. They are easier to access there anyway. The easiest way to measure for a pack is to put all of your gear in a box, mark how high it is and measure it out for the volume it takes up. But we are packing on a budget. Search social media sites and trade sites like Craigslist for a pack that is efficient for the size you need. I was able to trade up to a 75L Kelty bag. As long as you remember that you DO NOT HAVE to fill it, bigger is OK. The sacrifice will be in the unneeded weight increase. My Kelty weighs in at 4 lbs. 12 oz. An old Scout aluminum external frame pack will be sufficient. Or even a surplus army frame and pack, though heavy they are rugged. Opt for the medium though due to the large hanging the weight too far back causing you to have to lean more to the front.
                The rest of the gear can be improvised and upgraded over time. Just remember when given the choice between two items, pick the lighter one. If there is a reason you don’t like the lighter option, trade it for something else. Same thing can be said for the heavier option. Unless there is a reason for having it like using it when you bring someone else with you or for a loaner, trade it. There are other options as well. Thrift stores can have treasures in them if you know what you are looking for. I have found everything from sleeping bags, cast iron pans to trekking poles. My latest find are a set of Goode Carbon Fiber ski poles. Retail for this particular set was between $95 and $150 depending on where you looked since they aren’t made anymore. My cost, $3.00! I snatched them up as quickly as I could. I prefer a solid pole over a collapsing one anyway.  They work great for setting up my tarp, attaching my video camera and hiking. Wool clothing is another item I have scored from a thrift store. Lightweight wool sweaters, wind breakers, wicking shirts even rain gear. It’s all a matter of timing. I visit the several stores in my area a couple of times per month. A lot of times I walk out empty handed. It’s not about the things you don’t see, but the things you DO find.
                Every time I go out, when I come home I go over my kit and look for things I did not use. They go on a list of things to leave home next time. You have to be realistic though in you thinking. Just because it didn’t rain doesn’t mean you can leave the rain gear home next time. Ask yourself why you didn’t use an item. Was it too heavy? Does it not perform well? Is it inconvenient? For instance a rain suit is only good for a downpour. Otherwise you will get just as wet from perspiration on the inside. Another option for drizzle or light rain would be a small umbrella. A rain suit will only cover you, not your pack. A poncho will cover both, but your legs usually get wet from the rain dripping off. An umbrella will keep most of the rain off of you and your pack in most conditions. It can be stored in an outside pocket where it is easy to reach without taking your pack off. Making it more likely to be used and keeping you dry. No need to spend a lot of money on one either. Being in the woods you are going to be rubbing it against the trees and snagging it up. So you are going to replace it. Spend your money wisely and get a medium quality less expensive one.
                Shoes or hiking boots are another area people say they need before they can go out. I prefer running shoes over clunky heavy “Hiking Boots”. They are light weight, dry quickly and are less expensive. I prefer quick drying over waterproof. Your feet are going to get wet, whether it is from an outside source like water puddles, streams or dew. A pair of waterproof boots is only going to keep any water that does get into them, in. I would prefer to allow the water to escape as quickly as it came in. Another problem with waterproof boots is that they don’t allow perspiration to escape either. So your feet are going to be wet from the inside at the end of the day either way. If you have lightweight running shoes they will be able to air out faster and more efficiently. Meaning you should have dry shoes by morning without running the risk of burning them up by the fire.
                 Be sure to subscribe as we cover more items and ways to shave weight from your pack.

Wednesday, April 24, 2013

Health and Welfare


Wild Onion

As a Nation we are busy. So busy that Fast Food has become a billion dollar industry in a very short time. Growing up it was a treat to go to McDonald's or Wendy's. Now it seems it is a treat to sit down to a homemade family meal at home. We are so busy we drive to the gym to walk on a treadmill so we can watch T.V. while we do it. We are so busy we get upset when someone doesn't respond to our text message within minutes.

Growing up in the country meant that we had to drive into town for groceries. 5 miles wasn't a terribly long distance, but would take an hour's time to drive to town, get what you want and then drive home. That usually meant that take out pizza, which would not be delivered that far out, was cold when you got it home. Tin foil and the oven cured that because it just didn't taste right warmed up in the microwave.

Our health as a Nation has suffered a great deal because of it all. Getting back to natural foods is the only way to get back our health. Whole foods I think are the answer. I have always wondered why we separate and process foods. There are benefits to eating the entire food product. Just like herbs and medicinal plants. We research what ingredient of the plant cures what ails us, then mass produce only that part of it in a lab. Maybe just maybe that is why there are so many side effects to drugs these days.


Chickory


So to do my part of getting back to a healthy lifestyle I am going to plant an edible landscape. I rent so I am limited to what I can do and where. I have several flower gardens though that are plenty big for our family. I am going to start out with some simple herbs in containers, some greens and some veggies. One major obstacle is that my yard face North with a large tree on the south end. So what ever I plant will have to like shade. I have very little area to plant that faces South. Maybe enough room for 2 - 3 containers and that is it.

I am getting a late start probably on planting but I am busy until next week. So after the backpacking trip this weekend I will be heading off to the local nurseries and picking up some starter plants. Here is what I am thinking:
Mint - love it for taste and smell and looks
Parsley?
Cilantro
Oregano
Basil
Onions
Garlic
Leeks
Lettuce - couple of different varieties
Cabbage - Chines variety for color?
Tomatoes - cherry
Bell Peppers
Cucumbers
Celery
Stevia - Sugar substitute with so many other benefits.
Catnip - for the kitty
and we'll see what ever tickles my fancy that someone can suggest for a shady yard.

I would love to throw in some wild stuff too. Some flowers might be good for color maybe some that are edible.

I'll be sure to post some progress with pictures.

See you in the woods!
Jeff

Wednesday, April 17, 2013

Backyard Bushcrafting

     I want to let it be known that there is absolutely nothing wrong with practicing bushcraft in your backyard. If you are like me and have to travel for an hour and a half to get somewhere even partially secluded.


Emergency Shelter set up at a local park. Anywhere you can practice
your skills is good. Get in your dirt time where ever you can.

     Before heading out to the woods on an overnight adventure trying out new techniques and gear, you want to test them first. Before you have to rely on them. For instance there is no regulation on sleeping bag temperature ratings. Plus everyone sleeps different, so a 0*F bag might be good for one person down to 0*F but might only be good down to 15*F for another. My point being is that you need to test and use your gear in a controlled environment prior to relying on it for you life. Whether that be car camping, or camping out in the backyard. I have set up different tarp / poncho shelters just before major thunderstorms so I could test their integrity and storm riding abilities. It had rained so hard one time I was trapped in my poncho shelter due to torrential rain, while only being 20' from my backdoor! It was dry and comfortable in the shelter, so I waited for it to slow down before heading in and getting soaked. During which time I was texting a friend of mine who was testing his poncho shelter at the same time about 50 miles away. Both shelters held up well. I only got concerned when lightning began striking near me, and the ground had standing water covering it. That was when I decided getting wet was better then getting struck by lightning.

  
My Fire bowl and Bushchair in my Backyard.

      I have a fire bowl in my backyard for practicing fire skills. A charcoal grill will work just as good. In my city they frown on open fires, so I compromise with the fire bowl. It works well enough for what I want to do. If you are forced to use one as well there are a few things you want in a Backyard Bushcraft Fire bowl. You want a large low bowl preferably Stainless Steel. You want it low so that air can circulate under your fire lay. You will want to have drain holes in the bottom so that water can escape. I had to drill holes in mine. A screen to cover your fire is a good idea in the city and might be required. I chose a very simple design to best emulate what I might encounter in the woods.


Ferro Rod practice is best done in an environment where you
have the most control. Before You have to rely on it.

     Another advantage of Backyard Bushcrafting, the kids can tag along at very young ages without the worry of a 3 A.M. drive home. A favorite adventure of mine is outdoor cooking. Usually on a Charcoal grill. But this year will see more open fire cooking over the fire bowl as well as some dutch oven cooking.


     There are a lot of things we can do in our backyards that emulate being in the woods when we cannot be there. Taking the time to practice our skills, learning from our mistakes in a controlled environment is always a welcome relief from the daily stress of life. So put down that T.V. remote, head outdoors and get in some dirt time in your own backyard.

Tuesday, April 16, 2013

Updates

Updates are coming. They are long over due. I have to update the website and that is number one priority. Then Facebook. Then the site I use to register folks for classes. Then newsletters. Then this blog? Oops I forgot I even had a Blog! I don't know if this Blog is worth it? I might just Blof through the newsletter that I haven't put out in several months.

Any news will be added to the newsletter, Facebook page and the website. I don't know if I have time to keep up a Blog too. We'll see.

Any way for those of you who do check this for news, here it is...check the website. LOL

I will be at Four Square this weekend for a Basic Class. Then going hiking next weekend! A weekend to myself! (with friends, new and old) But it will be a weekend off of sorts. I do have some stuff I want to accomplish, and some of that is to CHILLAX!~

Later!~
See you in the woods!

Jeff

Thursday, April 26, 2012

Introduction to Bushcraft Weekend April 2012

I want to thank everyone involved thus far with Great Lakes Bushcraft getting started. Over the weekend of April 21st & 22nd we held our first official weekend overnight course, Introduction to Bushcraft. We had 10 students and 4 instructors in attendance. There were experienced folks to first timers. Most had car camped, and so they brought in a lot of gear. But that is exactly what the course was all about. Learning what you really need in the woods to be comfortable.
I have to admit that I myself skimped on layers, and was a bit cold at night away from the fire. I tried to get away from carrying an under pad for the hammock, won’t do that again anytime soon.  
We began the day early on Saturday morning at 9 am sharp. The wind was howling like a hawk, so we quickly moved towards the woods for some reprieve. Once in the woods we looked for widow makers while setting up our individual campsites, and tried to find level dry ground. An advantage with hanging, you only need two trees about 9-12’ apart. Having smaller children, providing shelter for them can be a task when hiking in. Especially when the youngest is 3 and has to carried part of the way.
I showed how to set up a hammock and tarp set up. I pitched the tarp close on one side and a roof on the other. My modified Baker Hammock Tarp. This allows me to use the hammock as a chair while cooking or other tasks in non-bear country. David had a simple lean-to with his bivy bag. Terry had a modified A-frame with mosquito netting. Shaun set up a modified open end pyramid with a single pole inside. Jamie set up his famous plow point he loves so much. We had a tarp for a wind break and reprieve for any rain that skirted around us Saturday and Sunday. A few knots were demonstrated for the best uses of a ridge line, tent pull outs and hanging a Hennessy Hammock.


Settled in we set up a sun compass when the sun peeked out from behind the clouds, which didn’t last too long. We did manage to get three good shadows in about an hour and a half. Tested against a compass, it was dead on! Then we demonstrated a proper fire lay, while everyone collected small tinder and kindling. Two hands worth of kindling to keep the fire going. Don’t use it all at once though. Save some in case you have trouble, and keep some for the morning fire for coffee. All of the students were able to get flame from a ferro rod and Mini Inferno.
We found some Chaga, discussed some uses for fire and tea. I made a small pot and shared it among us. A little too much sugar took away most of the nutty flavor, but we got enough to test. Shaun baked us some of his bread in his Swiss Stove set up, and it was good.
We collected firewood, made some furniture and talked around the fire. I laid out my 10 pc kit to show the essentials needed to take into the woods. Ken opened his soul by unpacking his bag in front of us all. We found a lot of redundancy in there. That can be from a habit of not emptying your bag before leaving out. I pack an empty bag before each trip. I keep small kits of gear in individual bags. Then I can switch them very easily. Learn the 10C’s of survivability, and you won’t ever forget the important stuff again.
Shaun slept next to the fire lay Saturday night. We built a reflector from some of the larger logs, but the stakes holding it were not far enough in the ground to support it. So early on it fell over. Shaun said that was fine since it was too warm anyway.
The next day we all woke up to a beautiful sunrise in the woods. The night got a bit cold, 34*F, but we all fared well enough. We were all packed up and on our way home by noon.
Be sure to meet us for the next campout May 5th -6th in Port Huron where we will begin the Bushcraft Basic’s Course. We will have stations set up for each student to master the skill taught throughout the day. 


Jeff “LFB” Kindy
Instructor
Great Lakes Bushcraft